A short introduction to Ports and Flags in Elm
A simple demonstration on how to work with Elm Flags and Ports, with interactive code

TLDR: Full minimal working example with ports and flags here , with a live demo here.
It's been a couple years now that I've been following the developments of Elm. I went to Elm Europe two years in a row now, but somehow my actual experience with the language is still very limited and I've only been writing a couple basic prototypes with it.
Elm is, as Wikipedia describes is better than I would
a domain-specific programming language for declaratively creating web browser-based graphical user interfaces. Elm is purely functional, and is developed with emphasis on usability, performance, and robustness.
I am no expert at functional programming, but Elm surely made me better at it. Elm is 'watch a movie at the same time and be sure your stuff will not be buggy' kind of good. It is pure and has a huge focus on compiler error readability. What it is means in effect is, if your stuff compiles, it's probably gonna be working as expected.
One of the things that intimidated so far though was the Javascript Interoperability. Because Elm is pure, the only way to interact with the bad, impure Javascript world is to push it to the borders and describe interfaces with it : Namely ports and flags. That seemed like a bridge too far for me until yesterday.
Ports and Flags
At its core, Elm is pure. What that means is that it is pretty much literally impossible to generate and handle side-effects when writing basic Elm. You cannot do anything that may fail, like getting the time from the system, or make an HTTP call. It has huge benefits. Any code you write cannot, by design, generate any runtime exceptions.
Of course, this is pretty limiting and one needs to interact with the world to build an application. The world is simply not pure. This is why Elm allows you to interact with the impure world via Flags, and Subscriptions. And you can generate your own interfaces with the outside using Ports that will generate trigger those subscriptions.
The best thing you should start with if you want to know more about ports and flags is to read the documentation by the creator of the language himself.
Essentially,
- Ports allow you to define an interface to and from Javascript. Because it is Command and Subscription based, those interactions will appear pure to Elm.
- Flags are a way to set some of the Elm model using data coming from Javascript at the very beginning of the instantiation of the Model.
I read those pages carefully, but some of the actual details were still quite blurry to me because there is no full working example there. This is what this post intends to fix. You can find the full working repository here.
Sending data Elm -> Javascript using Ports
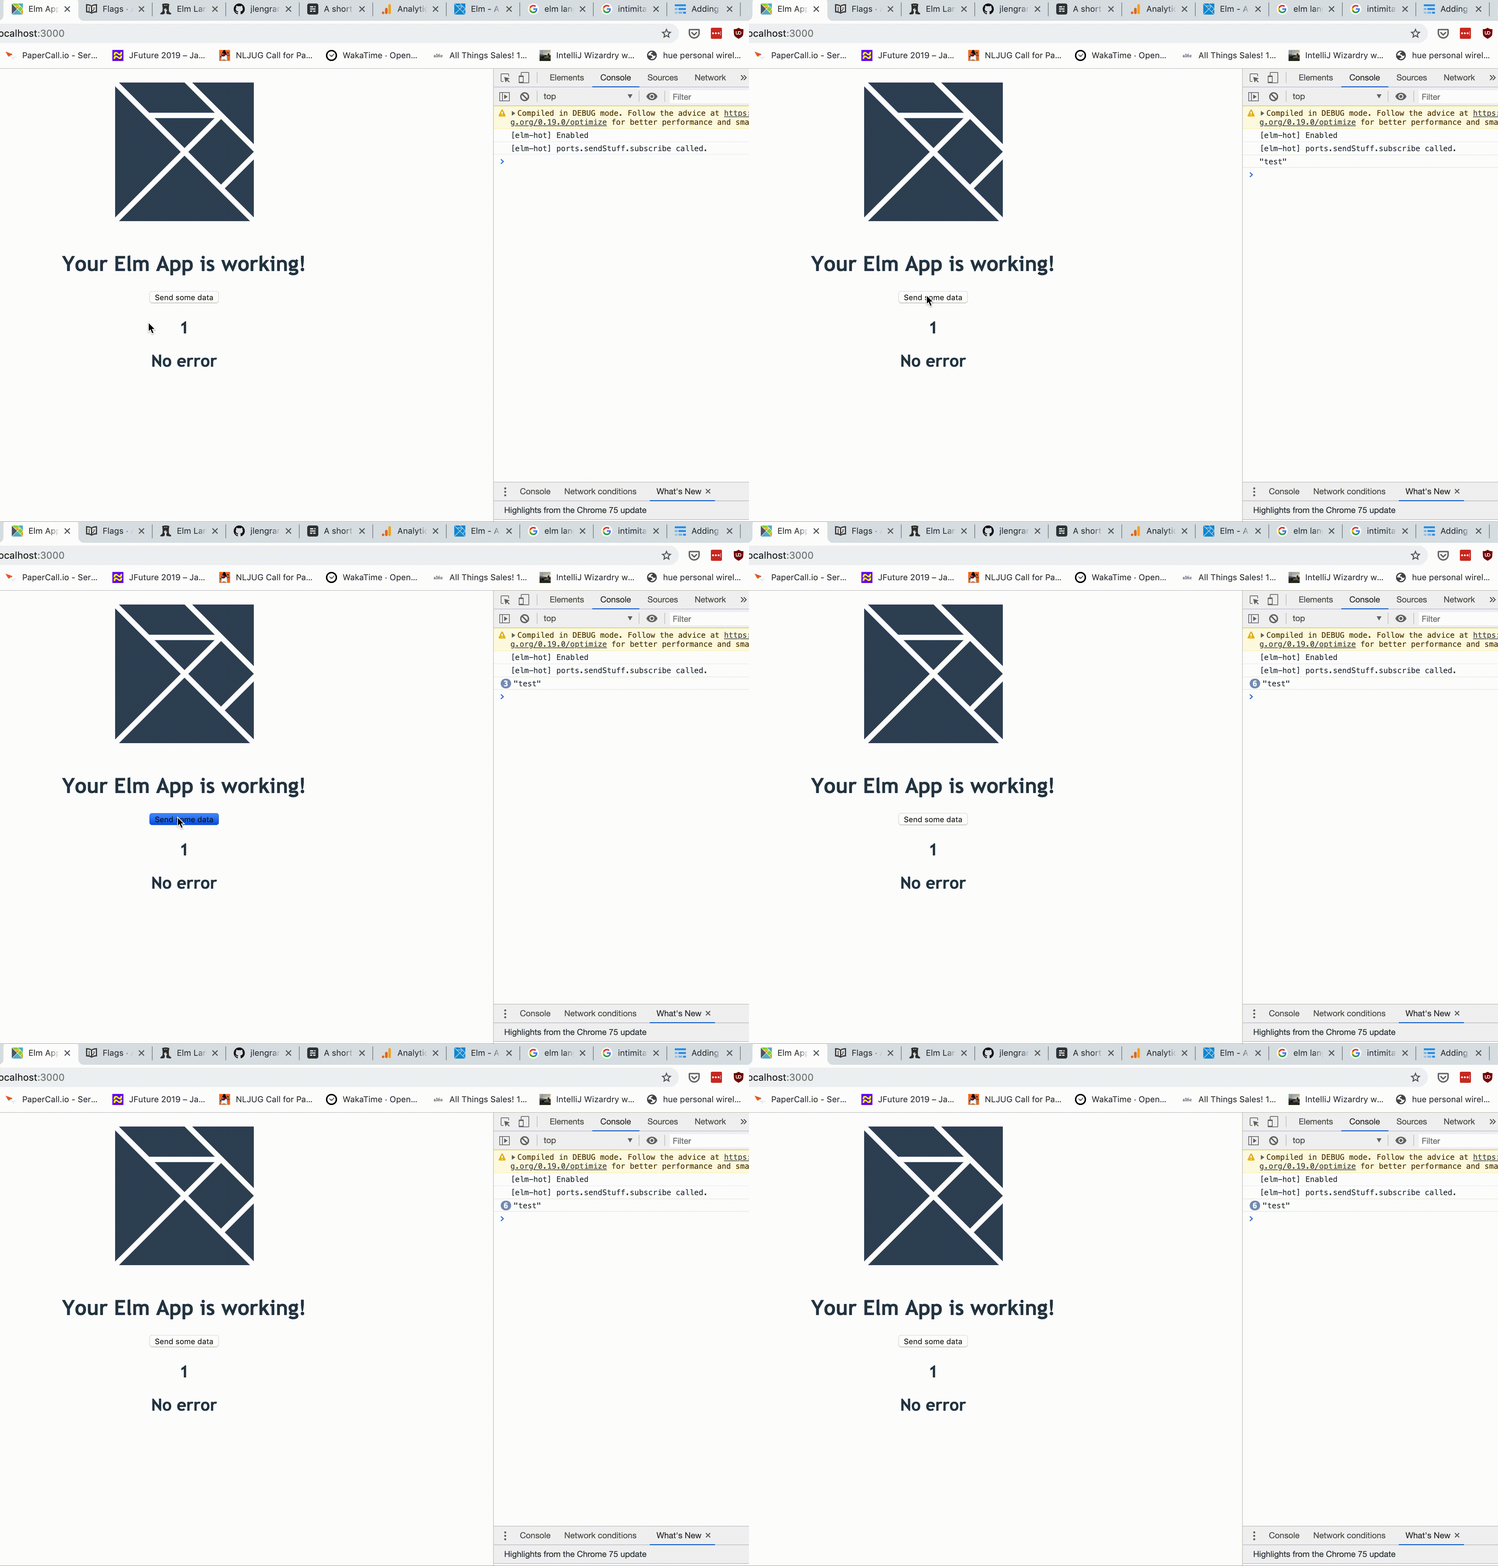
We will be doing the simplest thing possible : Sending some message to Javascript every time the user will be pressing a button. We will prove reception of the message using a console.log statement.
We first need to indicate that our Elm module will contain ports :
port module Main exposing (Model, Msg(..), init, main, update, view)
And then define our port. It will take some JSON encoded value as input, and generate a Command. Elm will know how to transform that Command into the Javascript world.
port sendStuff : Json.Encode.Value -> Cmd msg
The last thing we need is a way to trigger that method. We can do it multiple ways, but in our case we will create a SendData message that will be triggered on button click.
type Msg
    = SendData
and finally later in our view we trigger the message in our button
button [ onClick SendData ] [ text "Send some data" ]
We're set! Now, we need to connect the Javascript side of things to receive our messages :).
app.ports.sendStuff.subscribe(data => {
  console.log(JSON.stringify(data));
});
And that's it! Let's test it!

Sending data Javascript -> Elm using Ports
The process is similar than the last step, but just a little more complex.
First, we define our port
port receiveStuff : (Json.Encode.Value -> msg) -> Sub msg
Here, receiveStuff is a function that takes a function that takes a JSON encoded value as an input and returns something, and returns a Subscription with a payload. So we will have to use function composition somehow.
Because we receive JSON payload, we will have to use a Decoder. I will not explain this in details here, you can read more about Decoders here.
My payload is of form {value: Int} so the following decoder will be enough:
valueDecoder : Json.Decode.Decoder Int
valueDecoder =
    Json.Decode.field "value" Json.Decode.int
This allows us to create our Subscription:
subscriptions : Model -> Sub Msg
subscriptions model =
    receiveStuff (Json.Decode.decodeValue valueDecoder >> Received)
where our port gets the function that takes JSON in, and returns a payload as expected.
In our subscription, we defined Received. It is a message that will contain the result of our unmarshalled JSON. It can either be successful, or have failed. This lead to the slightly more complex code that handles errors:
type Msg
    = ...
    | Received (Result Json.Decode.Error Int)


update : Msg -> Model -> ( Model, Cmd Msg )
update msg model =
    case msg of
        ...

        Received result ->
            case result of
                Ok value ->
                    ( { model | counter = value }, Cmd.none )

                Err error ->
                    ( { model | error = Json.Decode.errorToString error }, Cmd.none )
The interesting line is where we set our internal counter to the new value.
The last thing we have to do in Elm is make our counter visible. We do this in the view
h2 [] [ text <| String.fromInt model.counter ]
Alright, the only thing left to do is to send the data from Javascript. For the sake of the demonstration, we will use setInterval to increase our counter once a second and periodically send the data to Elm.
let counter = 1;
setInterval(() => {
  counter += 1;
  console.log(JSON.stringify(counter));
  app.ports.receiveStuff.send({ value: counter });
}, 1000);
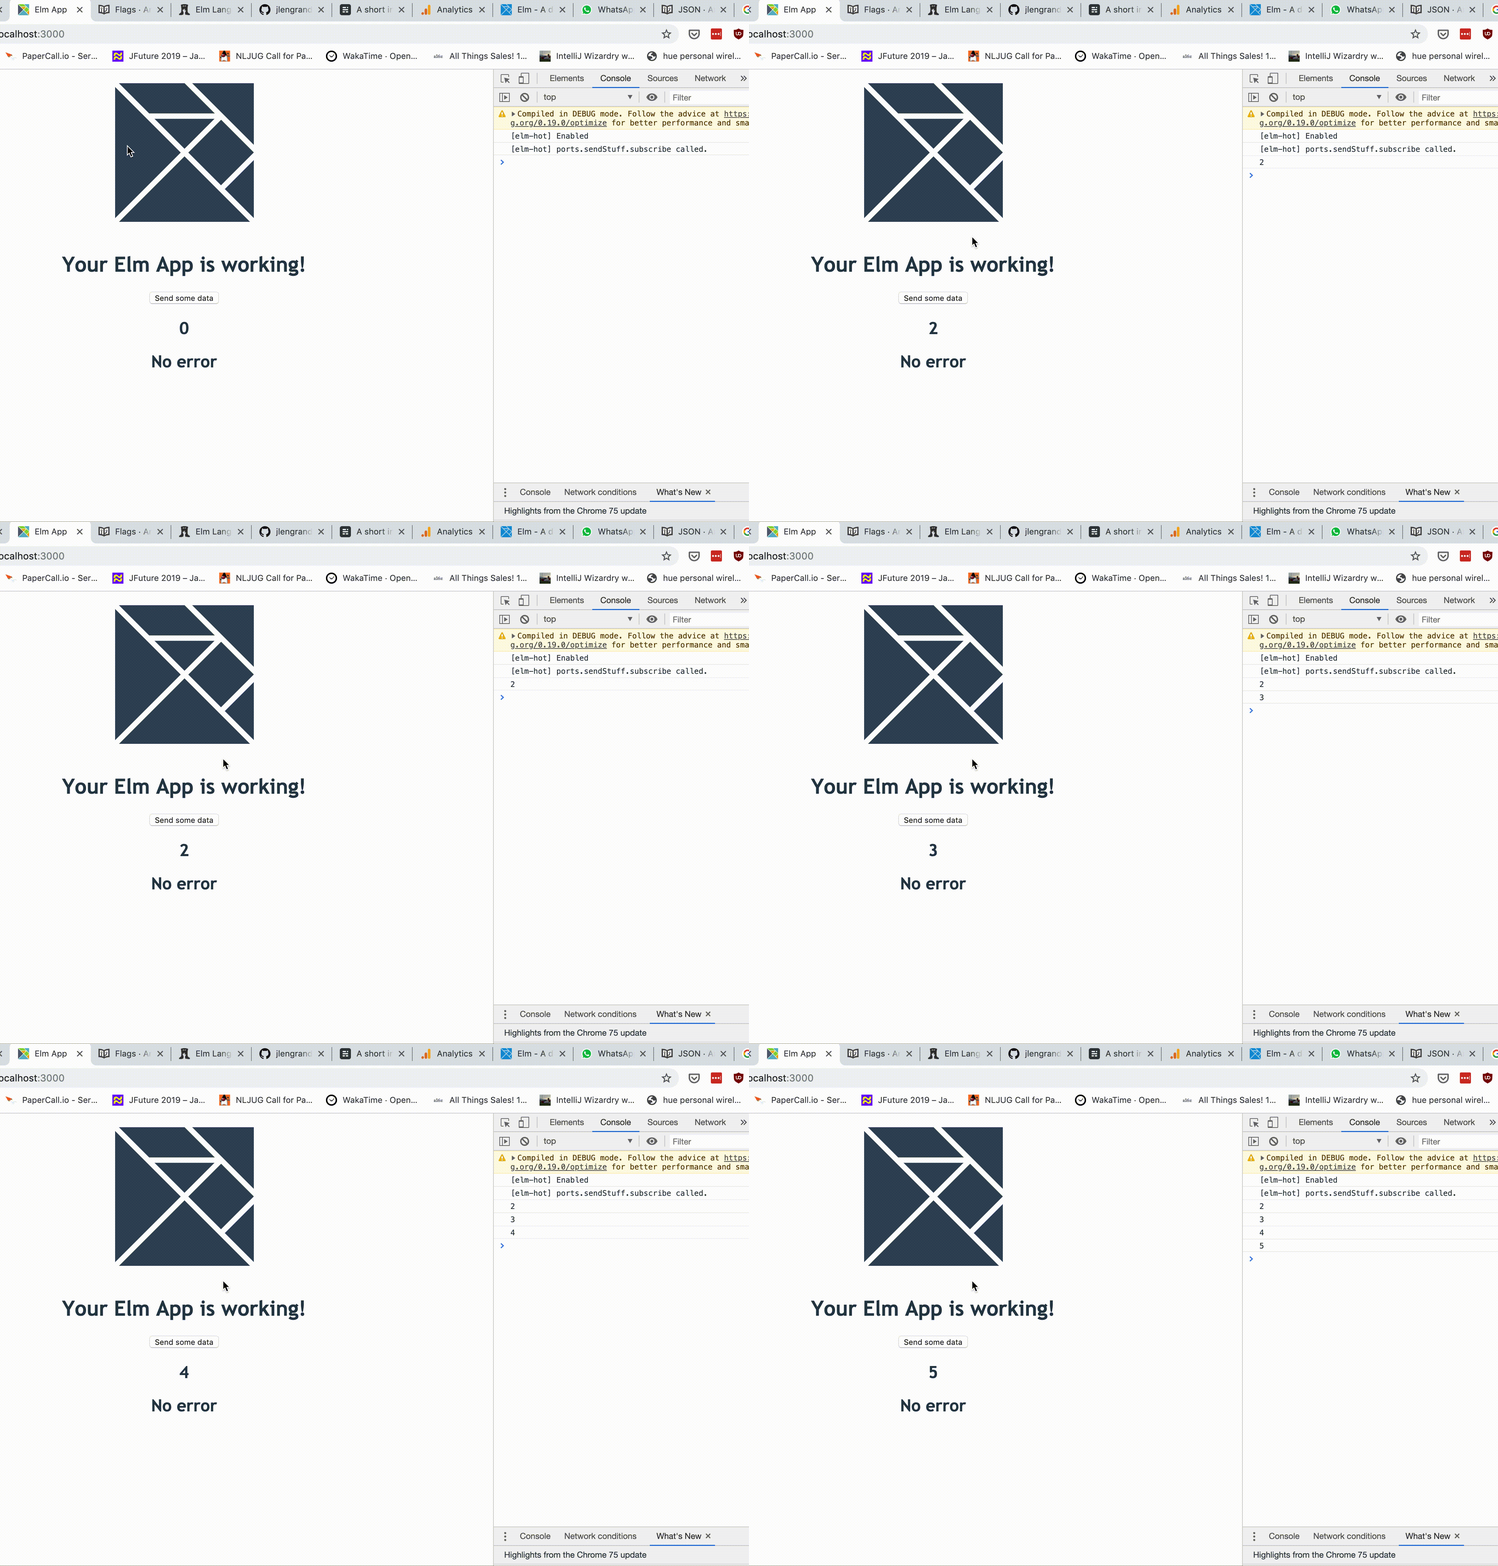
Let's test!

Setting initial model values in Elm using Flags
One of the things that we can remark from our last example is that in our application, our counter jumps from 0 to 2, without going through 1.
This is due to the fact that in our init method we chose to set the initial counter to 0. In effect, Elm initiates the whole model and returns a view, before the ports actually start being activated. This lead to us missing the initial 1 value of the counter in Javascript.
We can fix this using flags, so that Elm becomes aware of our initial value of the counter before instantiation.
The changes are relatively minimal. First, we will define a type alias that will describe in what form the data will be given to Elm. Because we send the data as such : {value: 1}, the following code will be sufficient :
type alias Flags =
    { value : Int
    }
Then, we make our init function aware of this input, and we take it into account when creating our model. Our init method now takes Flags as extra input, instead of an empty tuple:
init : Flags -> ( Model, Cmd Msg )
init flags =
    ( { counter = flags.value, error = "No error" }, Cmd.none )
Well, and that's it. Now, we simply have to share our initial value with Elm in our Javascript using the flags argument :
let counter = 1;

const app = Elm.Main.init({
  node: document.getElementById("root"),
  flags: { value: counter }
});
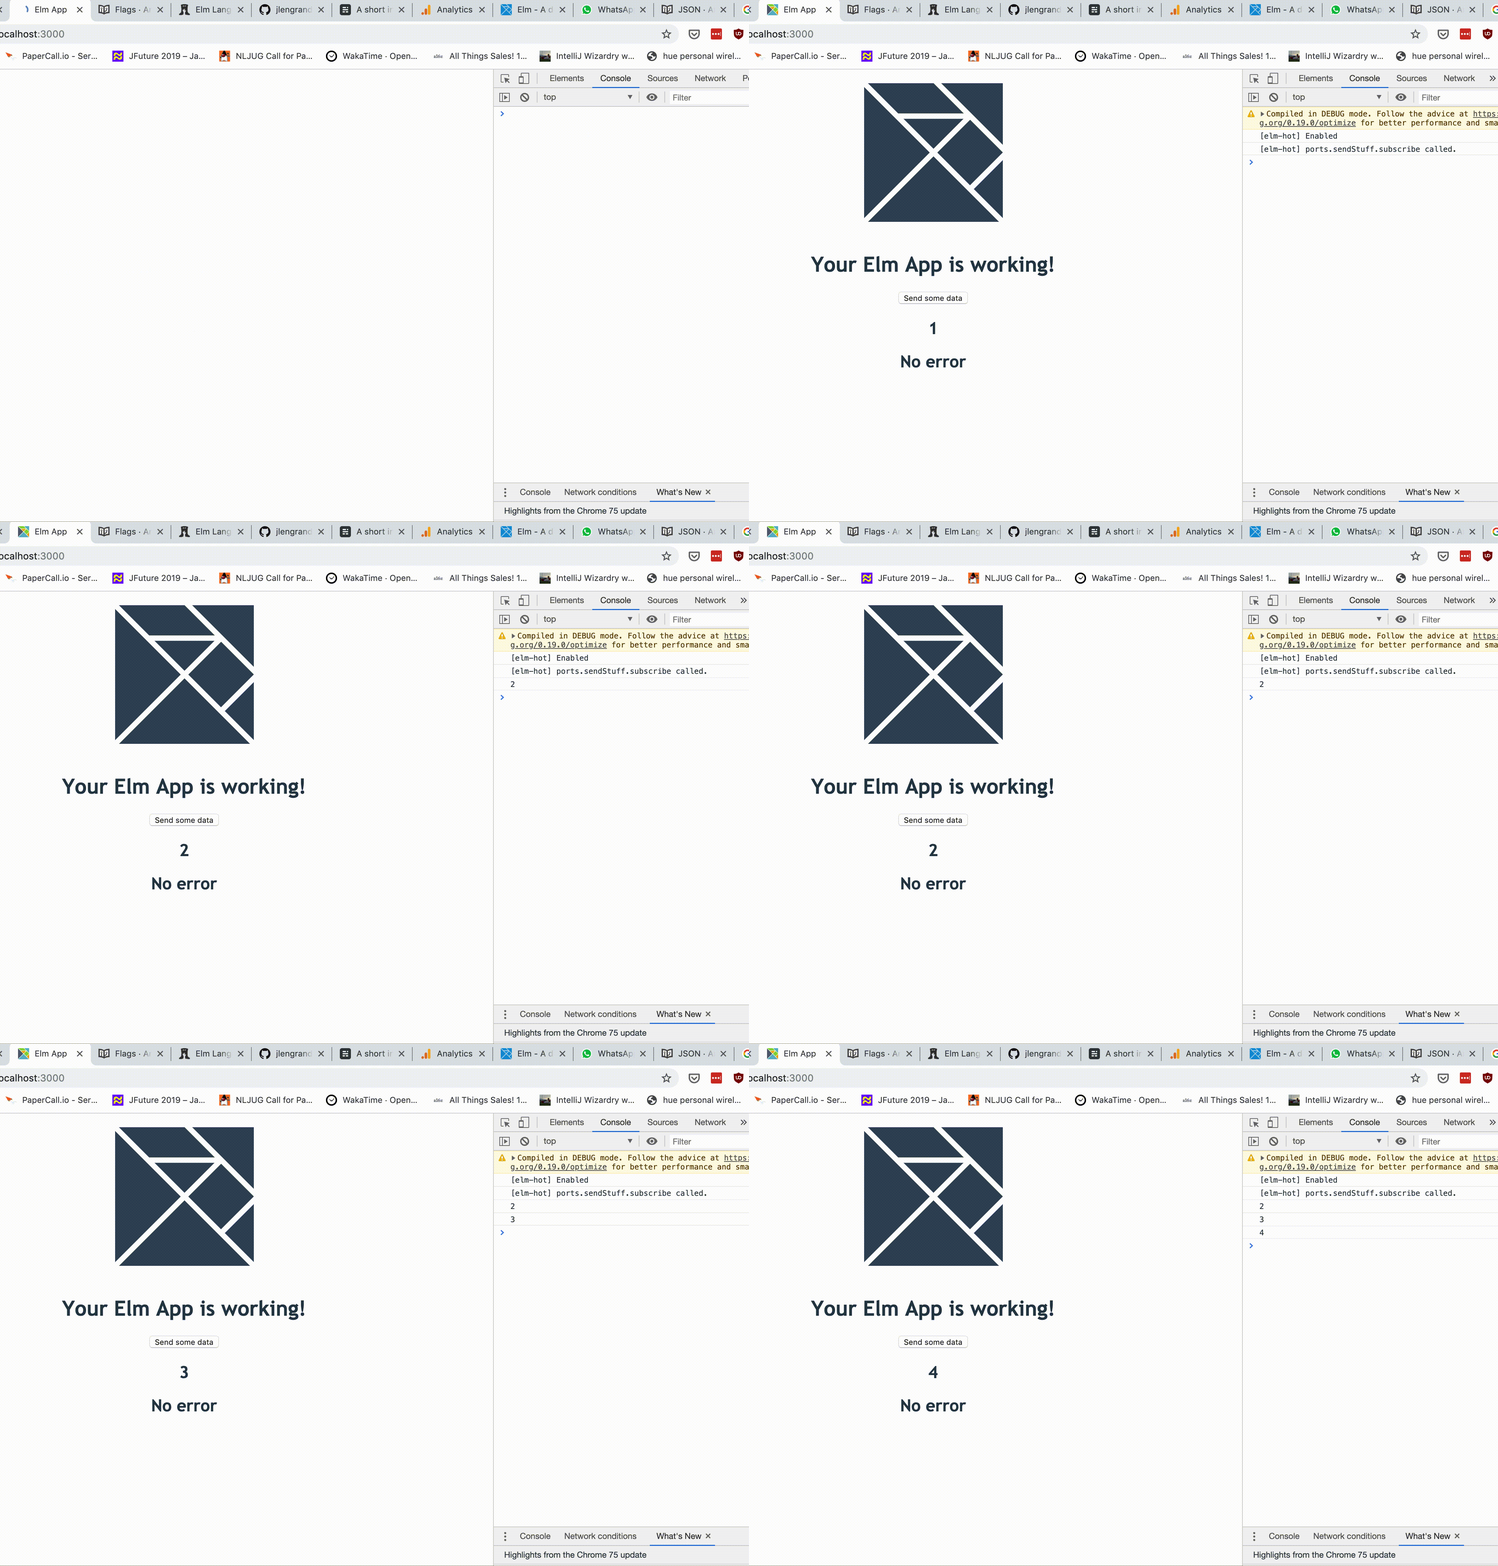
Let's see if that gives us satisfaction!
No more initial 0, and no more jump. That's what success looks like!

Final words
This post is lengthier than I would like, but I hope the extra information is useful. All in all, the complete code sample is just 100 lines of code so it should be convenient to read.
You can try the demo online here.
It took me a couple hours to really get into the flow of ports, but they really open up a whole world of possibilities for me now. No need to search for integration with libraries any more (for example firebase), since I can create my own. And all of that while staying purely functional. Pretty handy!
Of course, suggestions are always welcome. Hit me up @jlengrand, or simply on the Github repo.
