Jpackage : Overview of one of Java 14's hidden gems
Jpackage : Overview of one of Java 14's hidden gems. In this article we will create an installer for Minecraft using jpackage.


Typically, Java applications are deployed packaged as jar files, or war files for web applications. Newly, Java 14 comes with a new jpackage command that allows to create system applications (.msi, .pkg or .deb files).
Let's have a quick tour of the problems it can solve. For a complete description, you can have a look at the official JDK enhancement proposal. As an experiment, let's create installers of one of the most famous Java piece of software out there : The Minecraft server!
Checking that we have the correct version of Java
You'll need the latest Java 14 to enjoy the show. Luckily, Intellij allows to easily and painlessly install new JDKs. Let's make use of it!
We create a new empty project, and download the OpenJDK 14.
Once this is done, we can check that our java version is valid, and that we have access to jpackage as well.

All good so far. The last thing we need is the Minecraft server itself. We can download it here from the folks at Mojang, and place it at the root of our project.
Creating the installer
Alright, we have everything ready. We'll make a first crude attempt.
$ jpackage --name minecraft-jpackage --main-jar server.jar --input .
That's it! What did we do here? We indicated that
- Our main jar file was
server.jar(It already contains a Main class and the proper Manifest so we are good to go.) - It was located inside the current folder (using the
--inputoption). - We wanted an executable called
minecraft-jpackage. This is also the folder in which our application will install itself (C:\Program Files\minecraft-jpackagein this case).
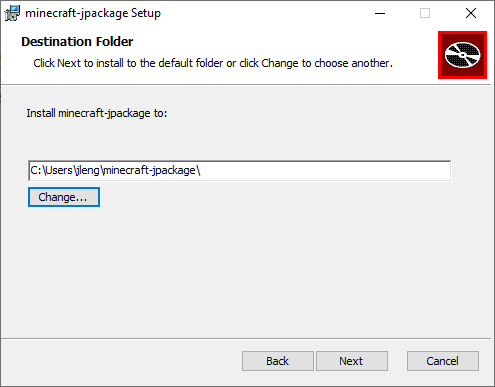
We let the command run, and quickly end up with a minecraft-jpackage-1.0.exe file in our repository.
On my machine, the installer is just over 80Mb, for an original server of about 35Mb. Not bad given that we embed a whole JRE as well. The installed version is about 160Mb.
The grand finale
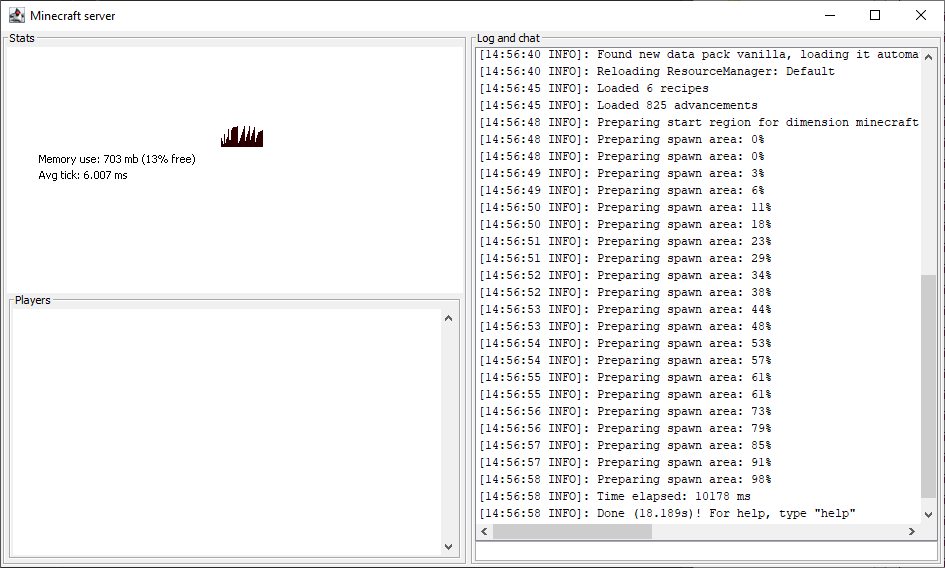
When running the executable, we see a simple (and native looking) installation menu. It installs as expected (you might get a warning because the installation wasn't signed, which is normal since we didn't).
Before enjoying our server, we have to go around a quirk of Minecraft.
- Run the executable file once as administrator.
- In the installation folder, a
eula.txtfile has been created - As administrator, change the value inside to
eula=true(meaning you accept the EULA and save the file.
Launch the application a second time! We can enjoy our Minecraft server!
Diving further
Now that we have a working installer, let's try out some more options!
$ jpackage --name minecraft-jpackage --main-jar server.jar --input . --java-options -Xmx1024M --java-options -Xms1024M --win-dir-chooser --win-shortcut
With a few extra options, we can get a nicer experience :
- The recommended java settings for running Minecraft
- A shortcut to run the application from the Desktop
- A dialog to choose our installation folder. This is very nice in our case because it avoids having to run Minecraft as administrator as required above.
Conclusion
A lot of the articles around Java 14 focus on records or the new switch expressions. But the jpackage is, as we have seen it, a small nugget that can have very practical uses! With a simple (CLI) interface, support for all OSes, it can be a perfect companion in some use cases.